Uncategorized
Diamond Painting Framing: A Guide for Finished Artwork
You finish placing the last drill, sit back for a moment, and look at the artwork you just spent hours creating. At the beginning it was only symbols, colors, and empty spaces on a canvas. Now it is something complete.
Then another question appears.
“How do I actually display this?”
A lot of people reach this point and leave their finished artwork rolled up somewhere “for later.” Days turn into weeks, and the painting stays in a drawer or on a shelf.
The truth is that diamond painting framing feels more difficult than it actually is. Most people already finished the hardest part. Framing simply helps turn your project into something ready for a wall rather than something hidden away in storage.
This guide walks through the process step by step.
Step 1: Prepare Your Finished Diamond Painting
Before thinking about frames, spend a few minutes checking the artwork itself.
Look across the canvas from different angles. You may notice that some drills sit slightly higher than others. This is normal, especially near sections finished recently.
Many people use a small roller to gently press the drills into place. If you do not have one, a hardcover book works surprisingly well. Leave it over the painting for several hours and let the pressure flatten the surface naturally.
While doing this, remove dust, lint, or small hairs that may have collected during the painting process. These little things often go unnoticed until the artwork is already framed.
People usually realize afterward that this simple step makes the finished result look much cleaner.
Step 2: Decide if You Want to Seal It
One of the biggest questions that appears during diamond painting framing is whether sealing is necessary.
There is no universal answer because people approach it differently.
Some seal every project because they want an extra layer of protection. Others prefer leaving the artwork untouched because they like the original texture and shine of the drills.
If your painting will be handled often or shipped as a gift, sealing can add extra security. If it will simply hang on a wall, many people skip this step completely.
If you decide to use a sealer, apply a light and even layer. More product does not automatically mean better results.
Step 3: Measure Carefully Before Buying Anything
This sounds obvious, but it causes more problems than people expect.
People sometimes measure the entire canvas and later realize they only needed the artwork area itself.
Before buying a frame, decide what you want to do with the extra canvas around the image. Some people trim it away while others hide it inside the frame. If you plan on wrapping the canvas around stretcher bars, part of that surrounding area will disappear around the sides.
Taking another minute to double-check measurements usually prevents the frustration of ordering something that almost fits.
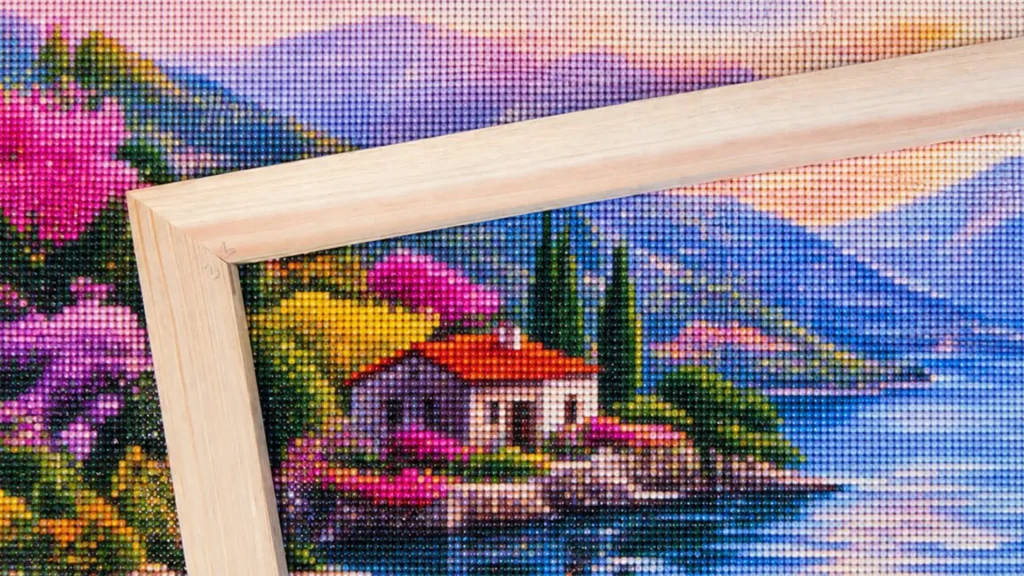
Step 4: Choose Your Framing Method
Different diamond painting framing methods create different results, and there really is not one correct option.
Traditional picture frames are still the choice many people start with. They are easy to find and work well for most sizes.
Some people prefer using glass because it protects the surface from dust. Others avoid it because diamond paintings naturally reflect light already, and additional glare can sometimes hide details.
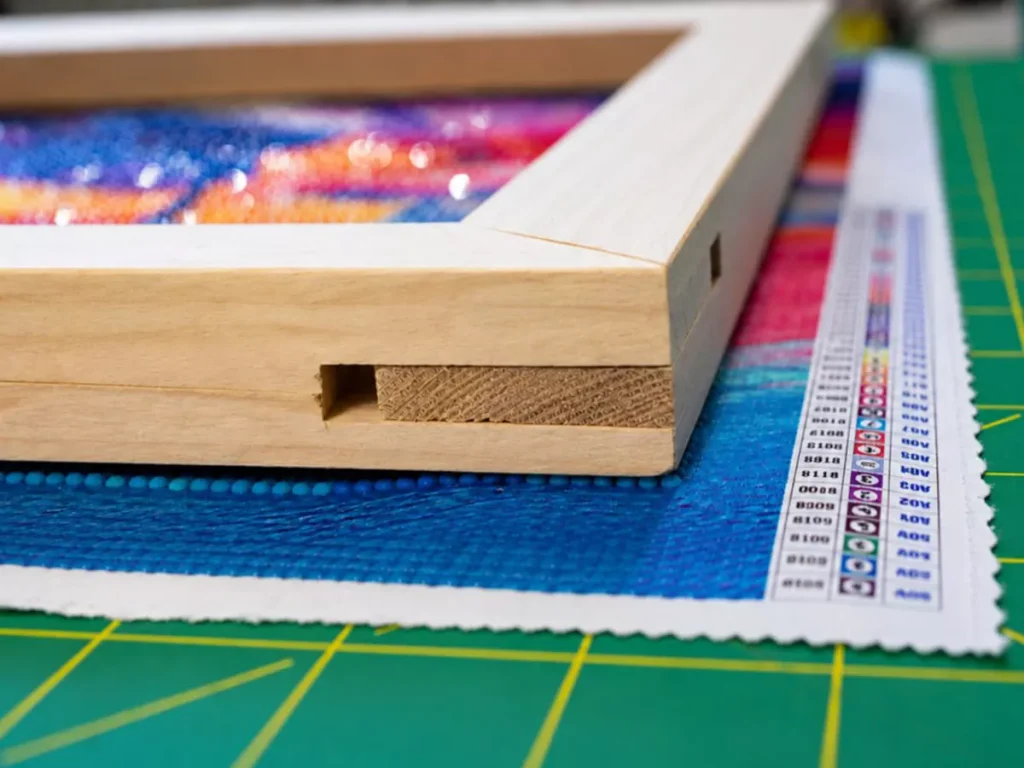
Another option that has become more popular is using stretcher bars.
Instead of placing the artwork behind glass, the canvas wraps around a wooden frame structure similar to traditional canvas wall art. This creates a cleaner appearance and keeps the sparkle of the drills visible from different angles. Stretching a canvas around bars is commonly used for a gallery-style look where no front glass is needed.
Magnetic frames have also become common because they require very little effort and create a simple appearance.
The best choice usually depends more on your space and personal preference than strict rules.
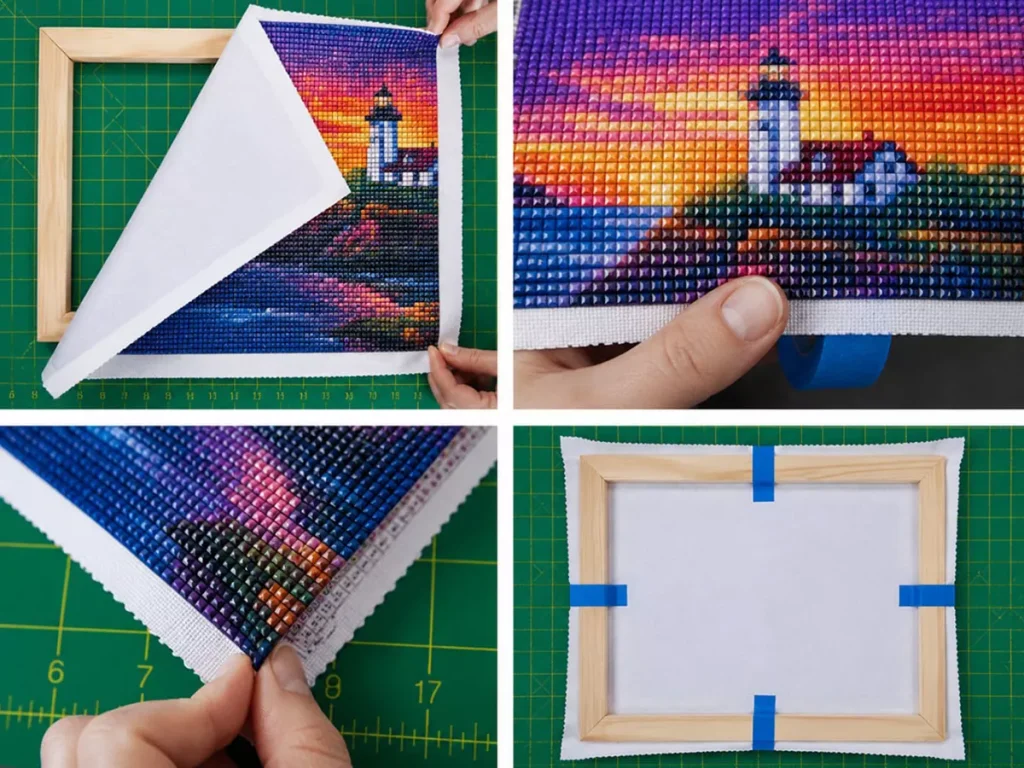
Step 5: If You Use Stretcher Bars, Work From the Center
People new to diamond painting framing sometimes pull one side tightly and move directly to the next corner.
That usually creates uneven tension.
If you are stretching your artwork onto bars, begin near the center of each side and slowly work outward while alternating between opposite sides.
The goal is not pulling as tightly as possible. The canvas simply needs enough tension to sit flat.
Too much force can sometimes create uneven pressure across the artwork.
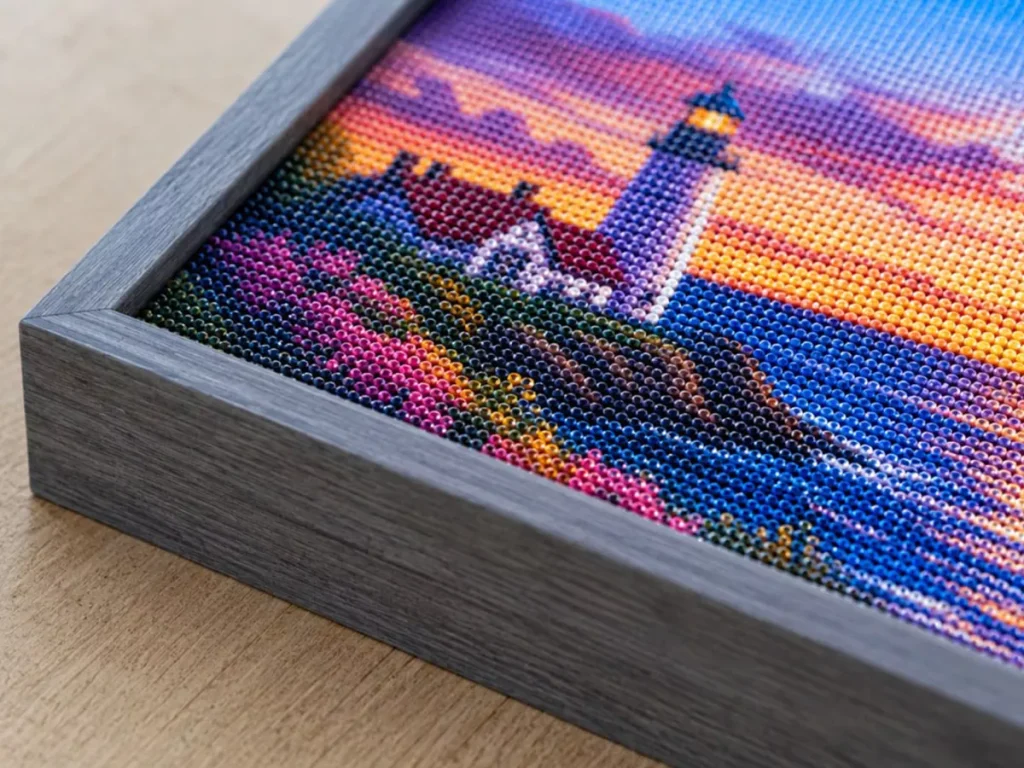
Step 6: Place Your Artwork Into the Frame
Once everything is ready, carefully position the artwork and make sure it sits evenly before securing it.
Take one last look before closing the frame.
- Check for trapped dust.
- Check that the image sits straight.
- Check that the borders appear even.
These small details only take a few seconds, but they are usually the first things people notice after hanging the artwork.
Final Thoughts
After spending hours placing every drill one by one, framing is really the final stage of the process.
A finished painting deserves more than being rolled up and forgotten somewhere.
Once the diamond painting framing process is finished, the artwork becomes something you can enjoy every day rather than only during the time you were creating it.
Discover Our Most Loved Kits
Extra Fine Pen For 5D Diamond Paintings
29.85 $Original price was: 29.85 $.22.85 $Current price is: 22.85 $.Diamond Painting Kit Paw Patrol | Premium DIY Artwork
Kentucky Wildcats Basketball Team – Diamond Paintings
Arkansas Logo – Diamond Paintings